XED - Manual Upload
IMPORTANT: At the bottom of this article, start by downloading the manifest-file for Microsoft Office or the XperienceED 1.0.6.zxp file for Adobe. This file is required to perform the manual upload in Step 9.
Step 1: Open your browser and navigate to www.office.com
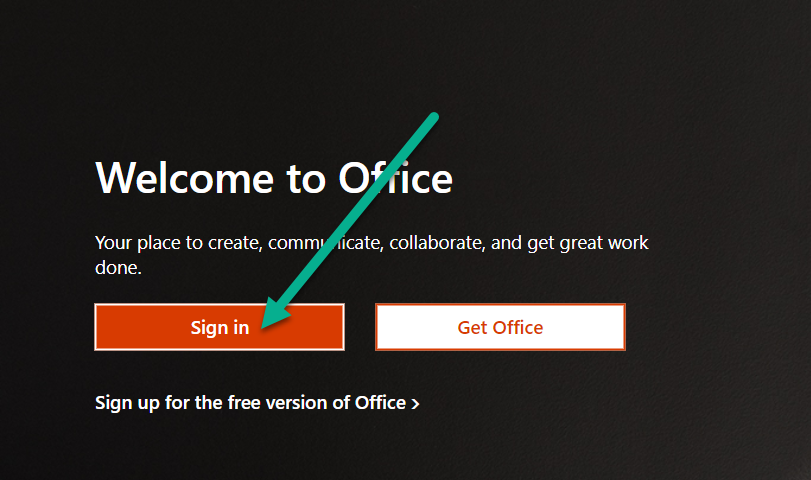
Step 2: Click the Sign In button
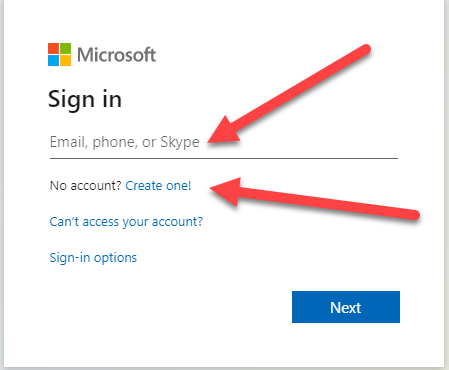
Step 3: In the dialog box that opens enter your Microsoft Account email address, phone number or Skype ID. If you have a Microsoft 365 (formerly called Office 365) account enter that email address. If you do not have a Microsoft Account click on Create One and setup a free @outlook.com email account.
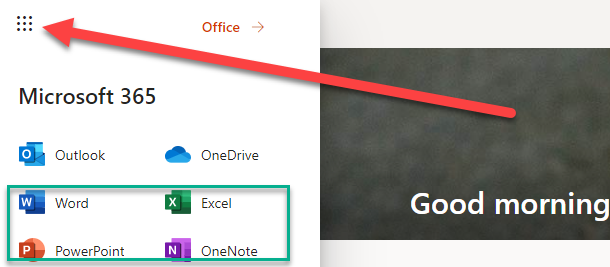
Step 4: Once you sign into your account click on the Waffle Icon in the Top Left Corner and then select the application that you're going to be studying.
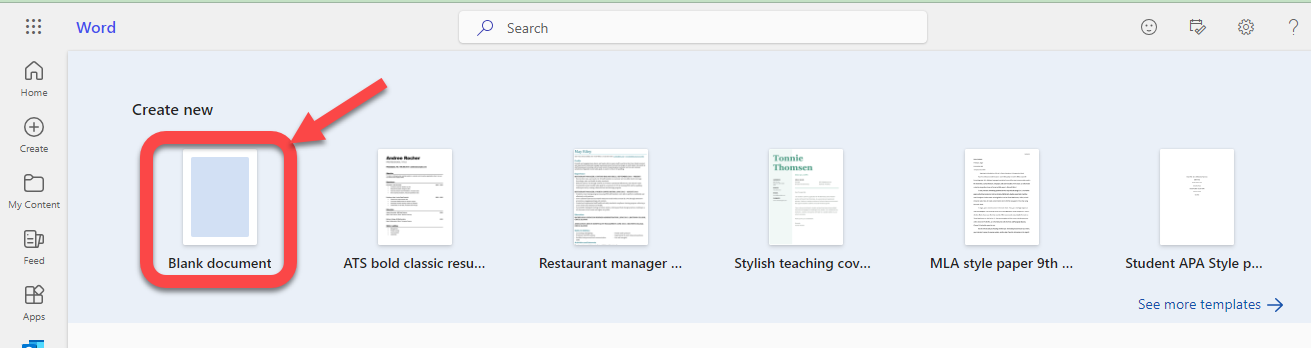
Step 5: For this support article I chose Microsoft Word. Click New Blank document to open the Microsoft Word Web App.
Step 6: When the blank word document opens, click Add-Ins on the Home Tab (make sure the Ribbon is expanded).
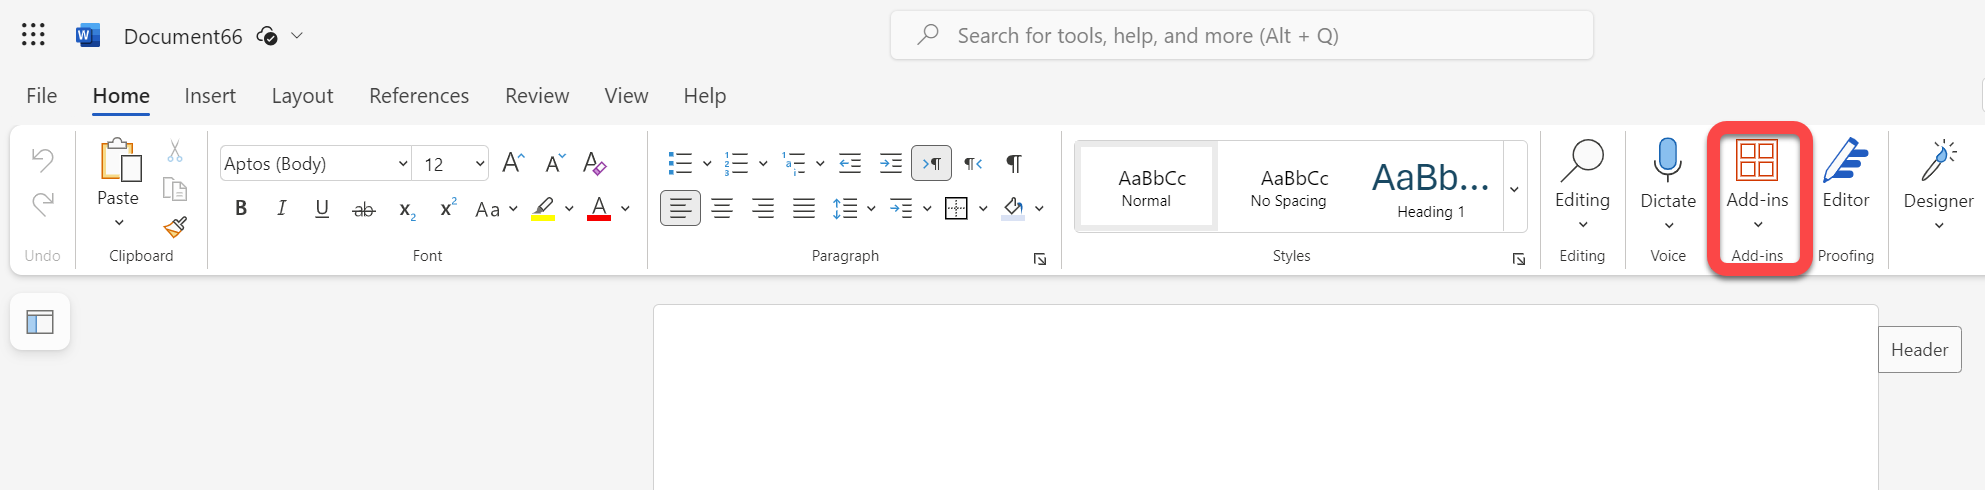
Note: If you don't see the Add-Ins option, make sure the ribbon is expanded by clicking the down arrow.

Step 7: Click on Advanced under the My Add-ins page
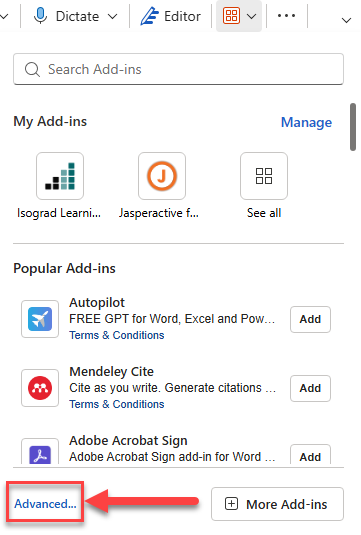
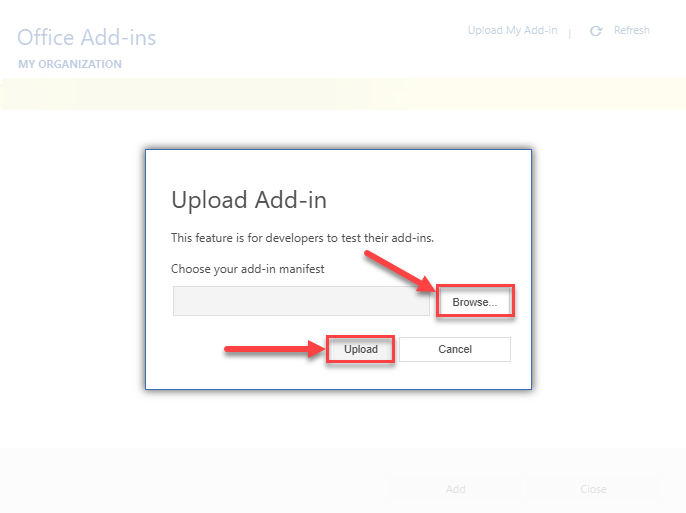
Step 8: Once this dialog box opens to manage your Add-ins then select Upload My Add-in.

Step 9: Select Browse and locate the file then click Upload.
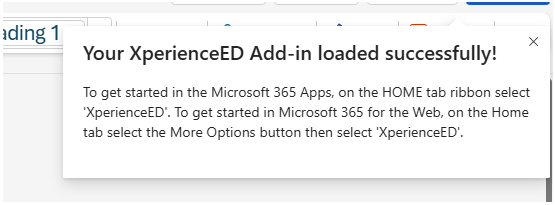
After a successful upload, you will be returned to the Office application and be presented with the Get started with...success message. Depending on which Office application was launched, and which type of Ribbon is activated, you'll find the XED menu icon in Step 10.
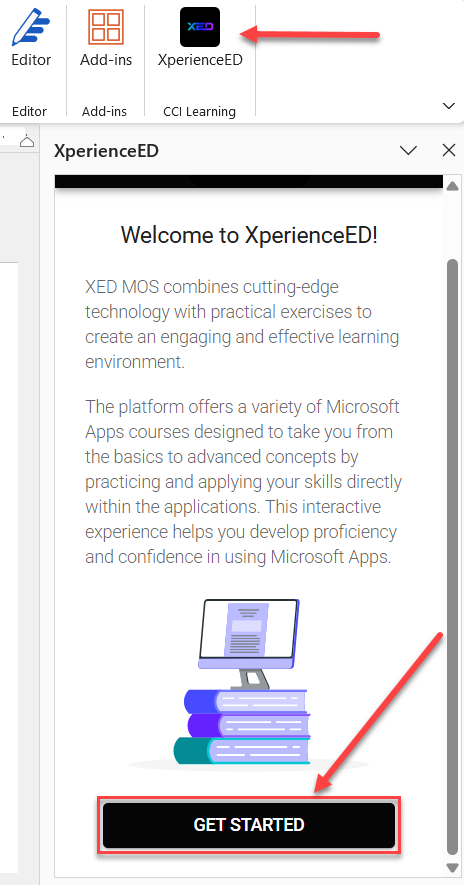
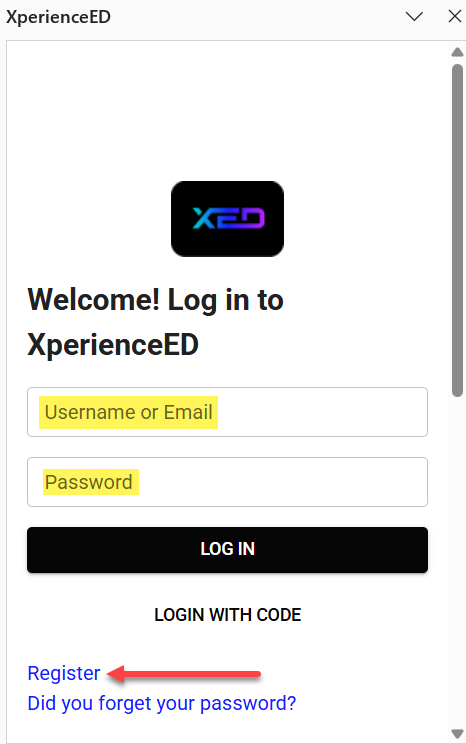
Step 12: You are now ready to login with your XperienceED credentials (if already established) or register a new user account.
Was this article helpful?
That’s Great!
Thank you for your feedback
Sorry! We couldn't be helpful
Thank you for your feedback
Feedback sent
We appreciate your effort and will try to fix the article